Southern California Sign Blog

Signs Los Angeles | All About Decals & Placement of Decals and more.

Posted by Julie and Chris Ramirez on Mon, Jan 2, 2012 @ 06:01 AM

All About Decals and Placement of Decals…….

describe the image

A well-placed, quality decal can greatly increase exposure for your brand. The opportunities for decal placement are everywhere, but some locations and sizes are better than others.

The most important factor in deciding on decal location and size is the surrounding environment. None of these graphics will be observed in a vacuum. Putting a beautifully designed decal in a place no one will notice it is much less effective than putting a dull decal in a highly noticeable area.

For example, placing a floor decal in the store transition zone is very ineffective. The transition zone is the store entry and a few feet into the space. Customers are adjusting to the change in stimuli and are not paying attention to details around them. It is not advised to put anything you want customers to pay attention to in the transition zone, including shopping baskets, store layout information and especially advertisements. Decals are more effective when placed on high-traffic aisle floors, store windows or walls and company vehicles.

The environment also dictates the content and size of the decal along with the placement. For example, a decal placed in a well-lit store aisle can have smaller text than a decal on a moving vehicle. Floor decals act as high-impact billboards in an under-utilized marketing space and can drive foot traffic, promote sales and highlight special products.

Floor Decal Image

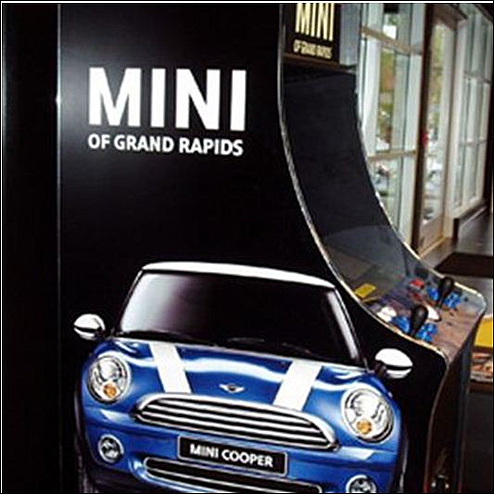
If a location has a blank wall, it is an excellent opportunity for a large decal. These large-scale designs are a great opening to grab attention with dramatic images.

A company vehicle is both a necessity and an advertising opportunity. An attractive vehicle decal gives your business exposure while the delivery van or work truck makes the rounds around town. Consider the varying environments the vehicle will be observed in. Be sure the lettering is high-contrast and put contact information in a large font size so the information can be absorbed quickly and in low light.

If you have any questions or need further information, please give us a call at (818) 843-9200 or visit our website at www.signstudiola.com – You can also reach us by e-mail at info@signstudiola.com

NEED QUOTE

Sign Quote

Topics: vinyl decals, Advertising, Decals, Floor and Wall Decals

Burbank Signs | Ready to Apply Vinyl Lettering Signs

Posted by Julie and Chris Ramirez on Mon, Dec 27, 2010 @ 07:12 AM

READY TO APPLY LETTERING – also known as RTA Lettering. 

If you are looking to save yourself some money and are confident in your application abilities, the following directions on how to apply your own vinyl lettering will help you to install your own signage. 

  1. Apply window cleaner, soapy water, or denatured alcohol to clean the surface where the lettering will be placed.  Use a lint-free cloth to wipe the surface dry. 
  2. Use a water-soluble pencil to draw guidelines and centerlines to help align the lettering. 
  3. Fill a spray bottle with a mixture of water and 3 drops of liquid dish detergent.
  4. Before applying, rest the lettering on a flat surface and carefully squeegee across the transfer tape that covers the bottom.
  5. Find the center of the lettering and make a small mark at that point on the transfer tape. 
  6. With the lettering face down, peel the backing paper away from the lettering, which will remain adhered to the transfer tape.
  7. Lightly spray the exposed sticky side of the lettering with the soapy water solution (if the letters are being applied to glass and are smaller than 1” in height, do not use the spray, it could cause misalignment.)  Small letters should be applied dry. 
  8. Place the lettering and transfer tape onto the surface, using any guidelines and centerlines you have made to help align the lettering.
  9. Squeegee the lettering from the center outward toward the edges, overlapping your strokes to prevent air and water from being trapped under the lettering.
  10. Leave the application tape attached to the lettering and let it dry for about one hour. 
  11. Remove the application tape.   Put the tape back at a 180-degree angle (flat) to the surface.  This will minimize the chance of the lettering being pulled up along with the tape. 

If you have any questions of need help with your Installation, please give us a call at (818) 843-9200 or e-mail us at thesignstudio@sbcglobal.net

 The Sign Studio, Burbank CA, RTA signs, vinyl graphics, vinyl application, vinyl signage

Topics: ready to apply vinyl letters, vinyl lettering, RTA lettering and vinyl, vinyl signs, vinyl decals